We often take our water pipes for granted until they stop working. When temperatures are extremely cold, the water in your pipes is likely to freeze solid. As water turns to ice, it expands and creates pressure that may cause your pipes to burst. In order to prevent water damage, we’ve put together this guide for thawing frozen pipes.
The temperature and the amount of insulation in your home help determine whether pipes will freeze. While water freezes at 32° F / 0° C, pipes typically won’t freeze until the temperature falls below 20° F / -7° C. For that reason, we recommend setting your thermostat closer around 68° F / 20° C and never lower than 55° F / 13° C.
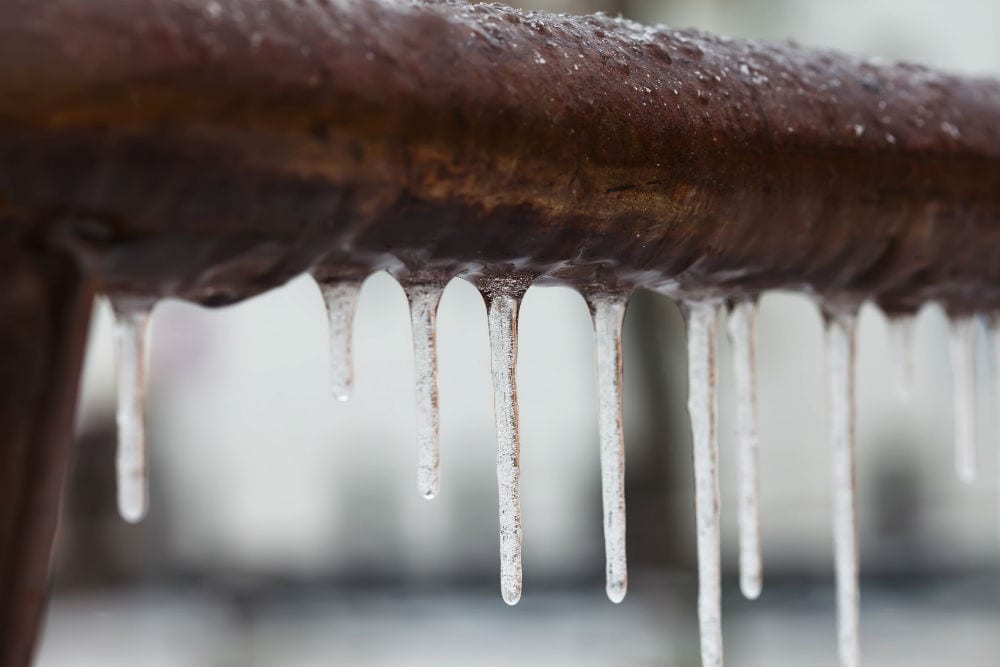
If your pipes are frozen, it’s likely that water will run very slowly, have ice crystals suspended in the water, or they may not even run at all. For pipes that are visible, you may see frost or ice on the outside of the pipes. You may also notice smells coming from your drains as waste gases build up.
3 Steps to Thawing Frozen Pipes
- Open Your Faucets – Open all of your faucets and allow water to trickle. This helps relieve pressure, decreasing the risk they will burst. Plus, it may speed thawing.
- Locate the Frozen Pipe – Find the section of the pipe that is frozen. Start by looking for the coldest areas in your property, then follow pipes from your faucet to the water main.
- Warm Frozen Pipes Slowly and Evenly – Once you’ve found the frozen pipe, warm it slowly. Work from the end closest to your faucet and then move towards your water main.
Will Frozen Pipes Thaw on Their Own
Pipes will thaw on their own, however, allowing them to unfreeze naturally is risky. The pressure of the expanding ice in the pipes could cause your pipes to burst at any time. You should always take steps to prevent pipes from freezing if the temperature is below 20° F / -7° C in your area. If your pipes are frozen, take action to thaw them immediately to prevent the pipes from rupturing.
How to Thaw Frozen Pipes
In order to thaw a frozen pipe, you need to need to find the frozen pipe first. These three steps will help you locate and thaw a frozen pipe, as well as relieve the pressure and prevent a burst pipe.
1. Open Your Faucets
As the ice forms, it expands and creates pressure in your pipes. If too much pressure builds up, it can actually cause the pipe to burst. Opening your faucets will allow water to flow and help reduce the pressure.
Depending on how frozen your pipes are, a small amount of water will flow or no water will flow at all. Check all of the faucets in your home, which helps you locate the frozen pipe and can prevent other pipes from freezing.
While you may be tempted to turn off your water supply, flowing water can actually thaw the ice. Even just a slight trickle is enough to thaw a pipe or prevent another frozen pipe. However, it is a good idea to locate your water supply shutoff valve just in case a pipe bursts.
2. Locate The Frozen Pipe
If only one faucet is not running or running slowly, the frozen section is likely isolated to that water line. If multiple faucets are not running, it’s possible that your main water supply line is frozen.
To locate the frozen pipe, look for areas that are the coldest. This includes pipes running through exterior walls, in basements, and in cabinets below sinks. Look for pipes that are covered in a layer of frost or feel extremely cold.
For frozen pipes affecting only one faucet, start by looking in the cabinet below a sink where water is flowing slowly or not at all. Then follow the pipe as best you can all the way back to the main water supply, which is typically located in the basement.
If the frozen pipe is affecting multiple faucets, start looking at the main water supply line and move toward your faucets. While it’s possible that the main water supply line is frozen, there could actually be several frozen pipes.
If you cannot see your pipes at all or if you cannot locate a frozen section within a few minutes, call a plumber or a water damage restoration specialist immediately. The chances of a burst pipe increase the longer you wait, so it’s best to have an expert inspect the situation as quickly as possible.
If you think your water meter is frozen, do not try to thaw it yourself. Instead, contact a plumber or your local water department.
3. Warm Frozen Pipes Slowly and Evenly
Once you’ve found the frozen pipe, you need to make sure it hasn’t already burst before you can begin thawing it. The ice could actually be working as a plug to hold back water, which could begin pouring out as you thaw the pipe.
Once you have inspected the area for water damage and the pipe for a rupture point, you can begin thawing the frozen pipe. You should start at the end closest to your faucet and work from the warmest part of the pipe to the coldest.
While you may be tempted to use boiling water or an open flame, the thermal shock can actually cause the pipe to burst. Instead, apply moderate heat slowly to allow the pipe to warm up slowly. Safe methods for thawing a frozen pipe are outlined below.
Also, keep the faucets open so water can flow away from the frozen section as it begins to thaw. As the pipe warms up, the flow of water will actually speed up the thawing process.
Safe Ways to Thaw a Frozen Pipe
From warm towels to your hairdryer, there are plenty of ways to thaw frozen pipes safely and slowly. Start at the warmest end of the frozen pipe that is closest to the faucet and work towards the frozen area.
When using an electric heat source, use the low or middle setting and try to warm small sections of the frozen pipe slowly. Since there is a potential for the frozen pipe to burst, take precautions to prevent electrocution when using an electric heat source.
In addition to one of these warming methods, you should turn up the thermostat on your heating system. While you don’t need to crank it up to 95° F / 35° C, the goal is to raise the ambient temperature in your home to at least 68° F / 20° C.
Soak Towels in Warm Water
A safe and efficient way to thaw frozen pipes is to wrap pipes in towels soaked in warm water. The water doesn’t need to be boiling, just a little above body temperature is warm enough to begin thawing frozen pipes. Once the towel begins to feel cool, wring it out and soak it in more warm water. While this can be very effective at thawing frozen pipes, it does require a working water source.
Heat Towels in Your Dryer
If you don’t have a working water source, you can also warm towels in your dryer. Unfortunately, the towels are likely to cool down very quickly so it helps to have several towels in the dryer at a time. As one cools off, replace it with a fresh, warm one. Repeat the cycle until the frozen pipe begins to thaw.
Heating Pad
An electric heating pad can also thaw a frozen pipe, but avoid the temptation to crank up the heat. Using the lowest setting will prevent a thermal shock that could cause the frozen pipe to rupture. Keep the heating pad near, but not directly on the frozen section of the pipe for the same reason. As the pipe begins to thaw, slowly move the heating pad towards the frozen section.
Hair Dryer
When using a hairdryer to thaw a pipe, use either the low or medium setting to prevent thermal shock. Keep the hairdryer moving, sweeping back and forth from the warmest part of the pipe towards to frozen part. Continue to blow warm air on the pipe until it begins flowing normally.
Space Heater
You can also use a space heater or heat lamp when thawing frozen pipes. Place your space heater a safe distance away and direct the heat towards the frozen pipe. Avoid putting a space heater directly under the pipe, as condensation may drip down and cause it to short out.
Heat Tape
Heat tape is a thin, long electrical element that you can wrap around a frozen pipe. You then plug the heat tape into the wall and it slowly warms frozen pipes. While it is available at most hardware stores, we recommend using another method to thaw a frozen pipe instead of making a run to the store. Wrap heat tape around the frozen pipe in a spiral pattern, leaving about an inch between each of the spirals.
Never Use an Open Flame When Thawing Frozen Pipes
While there are several ways to warm a frozen pipe, one thing you should never do is use an open flame. This includes lighters, butane lighters or torches, propane or gas burners, and any type of blow torch.
Direct heat from an open flame is likely to cause thermal shock. Since the frozen pipe is already under pressure from the ice, it’s extremely likely that it will burst. The high heat from an open flame can also weaken joints and connections in your pipes as well, increasing the risk of a burst pipe.
There is a risk of fire when trying to thaw a frozen pipe with an open flame. Most pipes run through wooden wall studs or floor joists, which could catch on fire either from the flames or from heating the pipe itself.
How to Thaw a Frozen Pipe You Cannot See
Thawing a frozen pipe you can’t see is more difficult, but it isn’t impossible. Before you go poking holes in your walls, turn your thermostat up to at least 68° F / 20° C, if not closer to 80° F / 27° C.
Position space heaters near the wall where the frozen pipe is, leaving at least two feet between them to prevent causing a fire. If you have multiple space heaters, evenly distribute them along the wall with the pipe that needs thawing. For frozen pipes in the ceiling or floor, place space heaters on the floor above the frozen pipe and aim it down.
Contact a plumber or water damage restoration company if water does not begin to flow within 20 minutes. The longer you wait, the greater the chance a frozen pipe will burst.
What to do After Thawing Frozen Pipes
Once you have thawed a frozen pipe, you should take steps to prevent a frozen pipe again in the future.
If the temperature remains below 20° F / -7° C, leave your faucets running at a slight trickle to prevent your pipes from freezing again. Also, keep your thermostat set to at least 68° F / 20° C and open cabinets below sinks to promote air circulation.
Once the temperature warms up, you should have a plumber come out for a complete evaluation. They will inspect your pipes, look for potential damage, and make recommendations on improving the insulation around your pipes.
What to do If You Can’t Find or Thaw a Frozen Pipe
If you are unable to locate the frozen pipe or cannot thaw it quickly enough, you should call a plumber or water damage restoration company immediately to access the situation. The longer you wait, the greater the chance the pipe will burst.
While waiting for them to arrive, try to warm your home as much as possible and stand by your main water supply shutoff valve in case a pipe does burst. Continue to leave faucets open to alleviate as much pressure as possible.
What to do if a Frozen Pipe Bursts
If your pipe does burst, turn off your main water supply shutoff valve as quickly as possible to limit water damage. Avoid walking through standing water until you are sure there is no risk of electrocution.
Call a water damage restoration company as quickly as possible to limit the damage. While you wait for them to arrive, begin moving personal possessions and furniture out of the room. You should also keep children and pets away from the water for their own safety.
Get Water Restoration Services After a Burst Pipe
Do you have water damage after a burst water pipe? Call 1-888-443-3110 now for a free estimate and emergency water cleanup services from a restoration specialist near you.


